In this blog, we’ll explore how you can efficiently group mates and organize fasteners within your SOLIDWORKS Assembly, ensuring smoother management of your assembly components.
Group mates and separate fasteners
In the Feature Manager design tree of an assembly, right-click Mates and click Group Mates.

Grouping Mates in Assemblies
- Click By Status to sort mates by status.
- If you have fasteners, the option to separate fastener will be active. Click Separate Fasteners to show fasteners in separate folders.
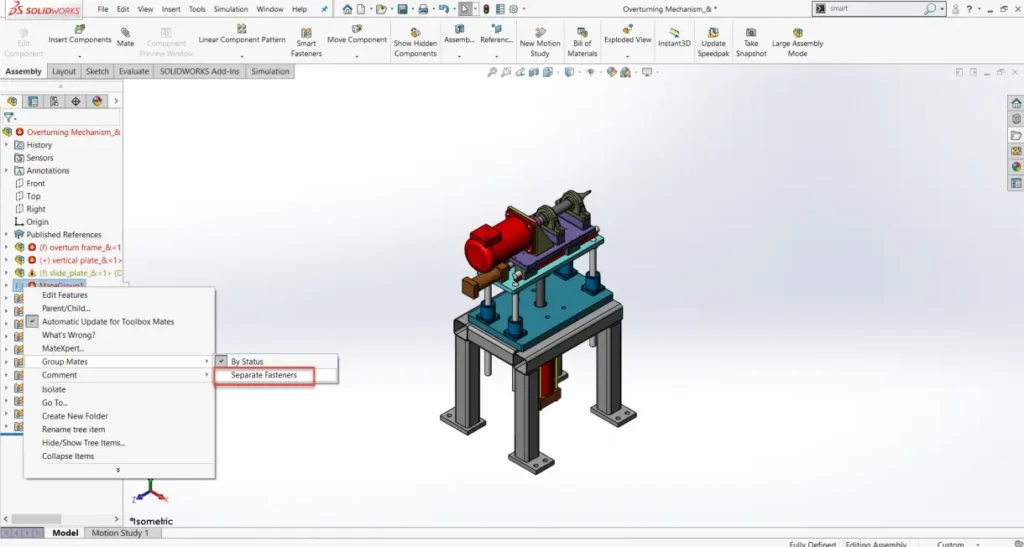
Separating Fasteners into Folder in Assemblies
This option separates mates that reference a Toolbox component into a Fasteners folder. If you edit a mate to include a Toolbox component, the mate moves to the Fasteners folder after you save the changes.
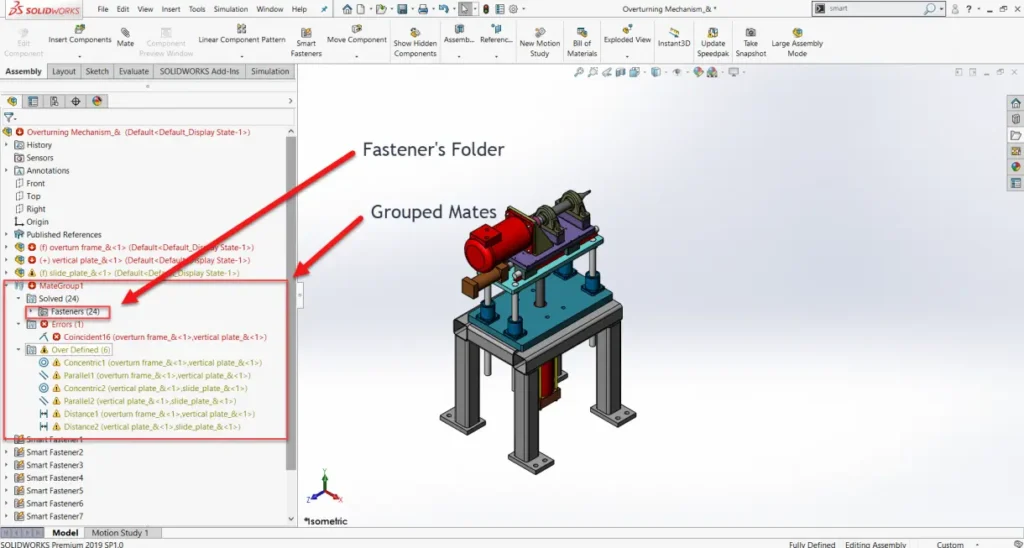
Grouped Mates and Fasteners in Assemblies
In front of each mate folder, the number of mates contained in each folder is displayed. This number includes the number of mates and the fastener sub-folder. Grouping mates does not affect the solve order for the mates and you cannot override the grouping manually. So, if there is a need to create user-created mate folders, you need to first deactivate the Group Mates option.